 knacksnews
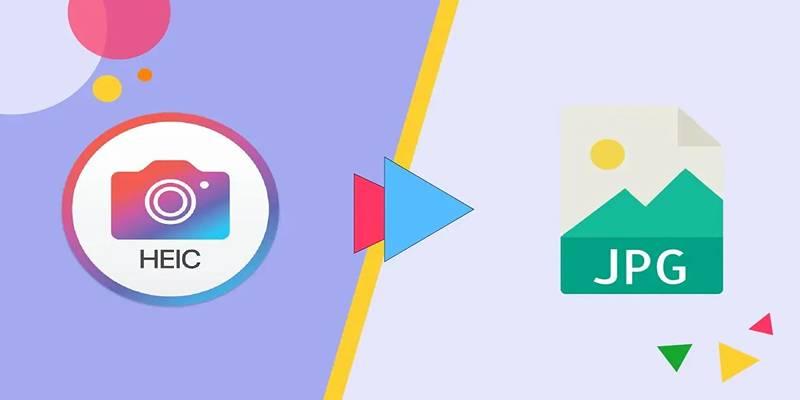
How to Fix iPhone Image Issues by Converting HEIC to JPG Format
Many iPhone users eventually face a frustrating issue—photos they’ve taken with their iPhones won’t open or upload properly on non-Apple devices. The reason often lies in the photo format Apple uses by default: HEIC. While efficient for storage and image quality, this format isn’t always compatible with Windows, Android, or various websites and editing tools.
This post explores how to fix these issues easily by converting HEIC to JPG, the most universally accepted photo format. Readers will discover why this happens, the risks of ignoring it, and simple solutions to ensure smooth photo sharing and editing across devices.
Understanding the HEIC Format
Apple introduced the HEIC format with iOS 11 to save storage space while keeping high photo quality. HEIC stands for High-Efficiency Image Coding, and it allows more efficient compression than the older JPEG format.
From Apple’s perspective, it’s a smart move: users can take more photos without running out of storage as quickly. But outside the Apple ecosystem, this format has compatibility gaps. Users trying to upload HEIC files to websites, open them on Windows PCs, or edit them in non-Apple software often run into errors or unreadable files.
Why iPhone Photos May Not Open on Other Devices
The incompatibility problem mostly arises because JPG is still the global standard. While Apple’s software supports HEIC natively, many operating systems and applications—especially older ones—don’t recognize the file format without extra extensions or plugins.
Some common issues include:
- Photos not opening on Windows without special software
- Upload errors on platforms that only accept JPG or PNG
- Inability to preview or edit images in third-party apps
- Printing services refusing unsupported formats
These problems can become a headache, especially for people who often share photos with others or upload them to work platforms, school portals, or cloud drives.
Why Converting HEIC to JPG is a Smart Fix
JPG (or JPEG) remains the most widely accepted image format. It’s compatible with almost every modern device, operating system, app, and website. When a HEIC file is converted to JPG, it becomes instantly easier to manage, edit, and share without the need for specialized tools.
Here are some key benefits of converting HEIC to JPG:
- Opens on any device, including Windows PCs, Android phones, and older Mac systems
- Uploads without issue to websites, including social media, job portals, and online forms
- Edits smoothly in apps like Photoshop, Lightroom, and web editors
- Prevents sharing problems across messaging and email apps
For users who value convenience, converting HEIC to JPG solves most of the compatibility headaches in one step.
How to Convert HEIC to JPG: 4 Simple Methods
There are multiple ways to convert HEIC files to JPG, depending on your device and preferences.
Change iPhone Settings to Save as JPG
You can stop your iPhone from saving photos in HEIC format altogether.
Steps:
- Go to Settings on your iPhone.
- Tap Camera > Formats.
- Select Most Compatible instead of High Efficiency.
This setting saves all new photos in JPG automatically.
Use the Files App to Convert on iPhone
If you already have HEIC photos, here’s how to convert them to JPG without third-party apps:
Steps:
- Open the Photos app and select the HEIC image.
- Tap the Share icon and choose Save to Files.
- Save the image as a copy.
- Now open the Files app, locate the image, and share it from there—it will be converted to JPG.
This method is useful for quick one-time conversions.
Use Online HEIC to JPG Converters
If you're on a PC or Android and have received HEIC images, online tools make conversion simple.
Popular Free Tools:
- heictojpg.com
- cloudconvert.com
- convertio.co
How it works:
- Upload your HEIC file.
- Choose JPG as the output format.
- Download the converted image.
Tip: Don’t upload private photos to online converters you don’t trust. Use them only for non-sensitive images.
Convert on Windows with Built-In Tools or Apps
Windows 10 and 11 support HEIC with the right codec, but JPG is more widely compatible.
Options:
- Use the built-in Photos app to open HEIC files and choose Save As > JPG.
- Install HEIF Image Extensions from the Microsoft Store to open HEIC files.
- Use apps like IrfanView or CopyTrans HEIC for bulk conversion.
Pros and Cons of HEIC vs. JPG
Understanding the trade-offs helps users decide when to keep HEIC or convert to JPG.
HEIC Pros:
- Saves storage space
- Maintains better photo quality
- Supports features like Live Photos and transparency
HEIC Cons:
- Poor compatibility outside of Apple
- Not accepted by many websites
- Requires conversion to share easily
JPG Pros:
- Universally supported
- Easy to upload, open, and edit
- Compatible with all devices
JPG Cons:

- Larger file sizes
- Slight quality loss due to compression
- Doesn’t support advanced image data
When to Keep HEIC and When to Convert
Some users might prefer keeping HEIC if they only use Apple devices or prioritize storage. However, converting to JPG makes more sense when:
- Sending files to others who may not have Apple devices
- Uploading to platforms that require JPG
- Printing photos at third-party services
- Backing up photos in shared drives
To avoid repetitive conversion tasks, users can set their iPhones to save in JPG format by default, as mentioned earlier.
Conclusion
The HEIC format offers storage efficiency and quality benefits for Apple users, but it creates unnecessary roadblocks when working across platforms. By converting HEIC to JPG, users can quickly fix iPhone photo compatibility issues and enjoy hassle-free sharing, editing, and uploading of their pictures. Whether through a quick settings change, desktop software, or an online tool, the solution is simple—and it keeps users in full control of their photo files.
On this page
Understanding the HEIC Format Why iPhone Photos May Not Open on Other Devices Why Converting HEIC to JPG is a Smart Fix How to Convert HEIC to JPG: 4 Simple Methods Change iPhone Settings to Save as JPG Use the Files App to Convert on iPhone Use Online HEIC to JPG Converters Convert on Windows with Built-In Tools or Apps Pros and Cons of HEIC vs. JPG HEIC Pros: HEIC Cons: JPG Pros: JPG Cons: When to Keep HEIC and When to Convert ConclusionRelated Articles

JSON to CSV Conversion Made Easy: Tools Every Analyst Should Try
Airtable vs. Notion: Which App Should You Choose for Your Workflow

How to Debug and Fix Crashing VS Code Extensions Effectively

Export SQL Query Results to Excel with These Free Online Tools

Learn to Remove Backgrounds from Any Image Without Photoshop

Bootable USB Creation Made Easy: 3 Tools You Should Be Using Now
Create Branded QR Codes with These Top Custom Generators Online

AVCLabs Video Enhancer AI: Is It Really Worth Your Trial?

Jotform vs. Typeform: A Head-to-Head Comparison of the Best Form Builders

Capture Gameplay Smoothly: 5 Great ShadowPlay Alternatives
Fixing Zoom Audio Problems: A Step-by-Step Troubleshooting Guide